Table of Contents
Schedule Journal #
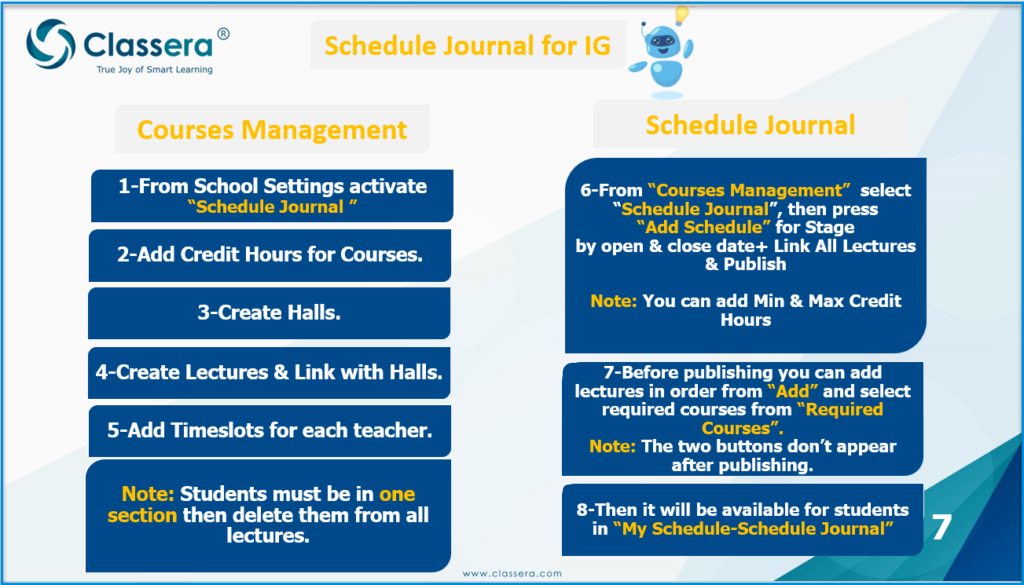
The system allows you to control the Schedule Journal on the main platform through the system manager’s account, following these steps:
- Click on the Courses Management drop-down from the sidebar menu.
Adding a Course: #
- Click on the Courses Management drop-down from the sidebar menu.
- Click on the Courses button to navigate to the courses and their content screen.
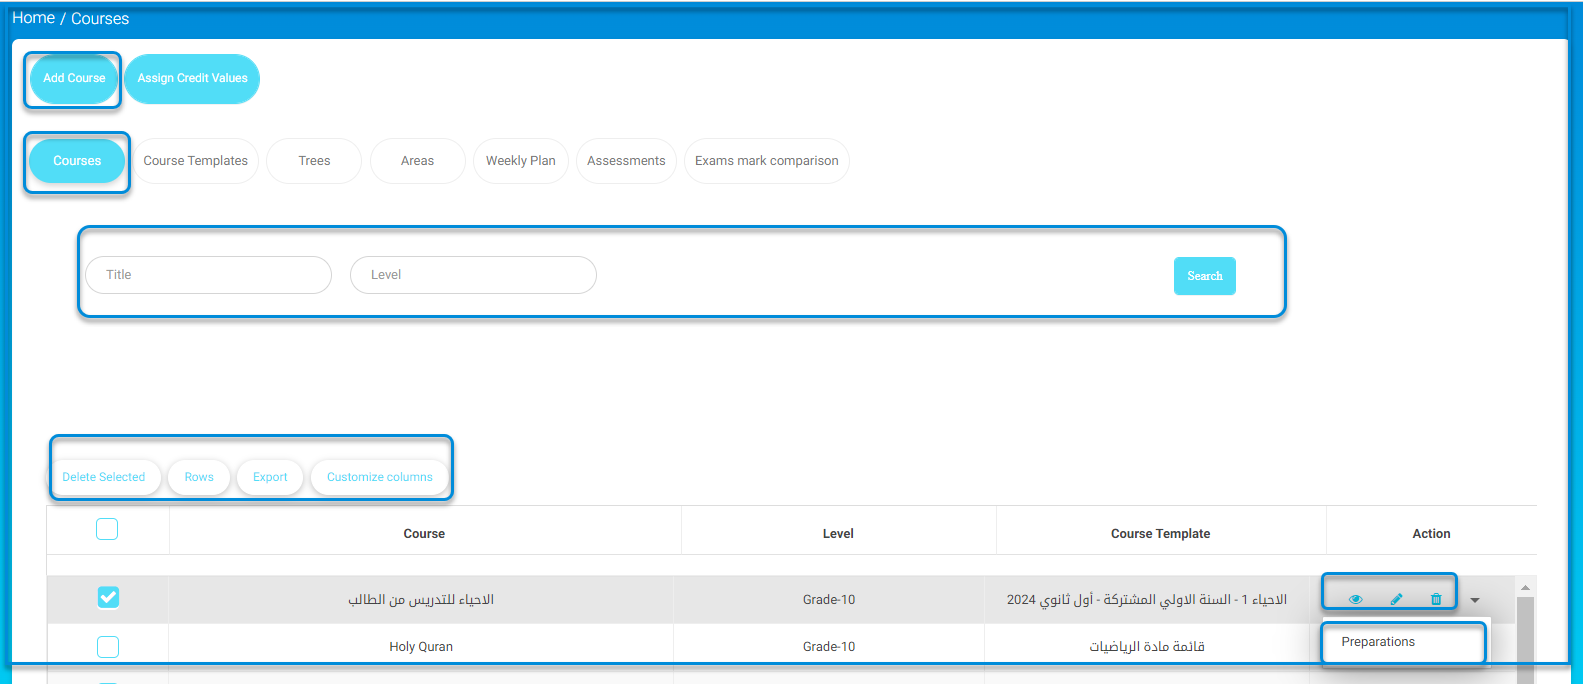
- Click on the Add Course button.
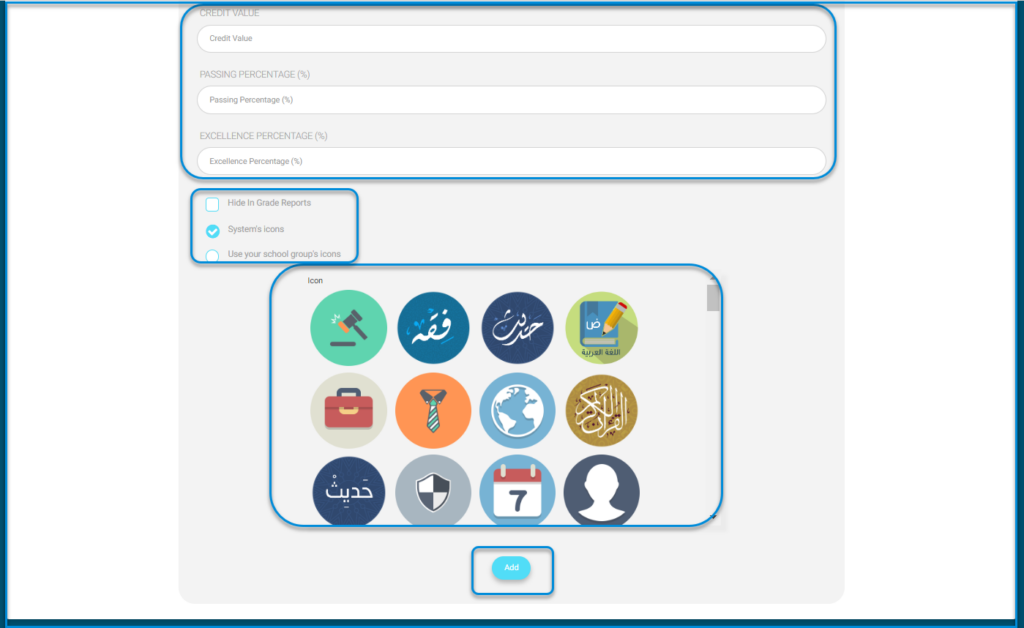
- Enter the course’s details.
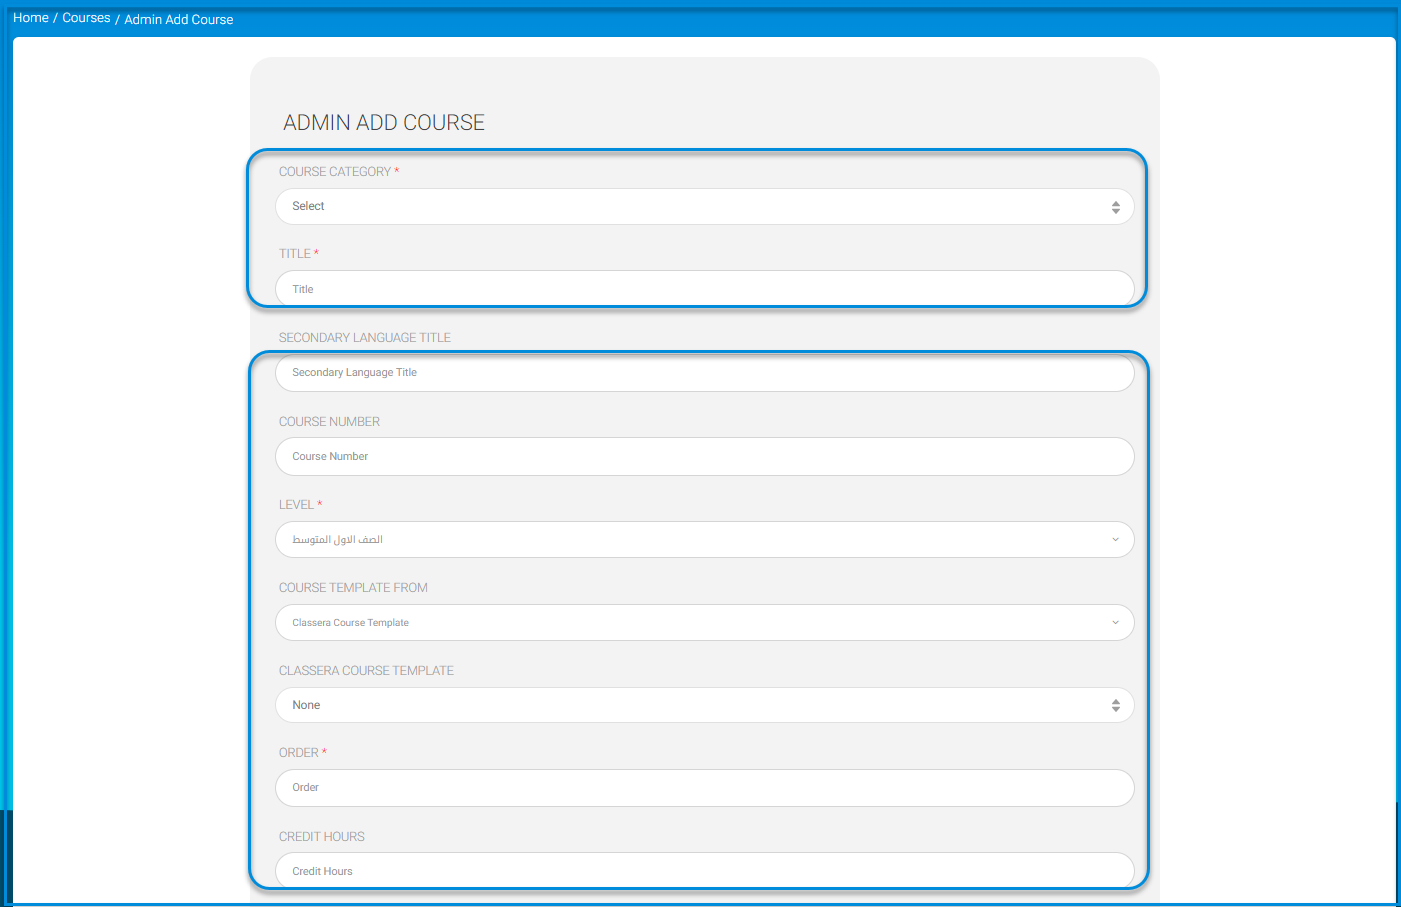
- Click on the Add button.
- Return to the main Schedule Journal page to confirm linking the added course to the sections.
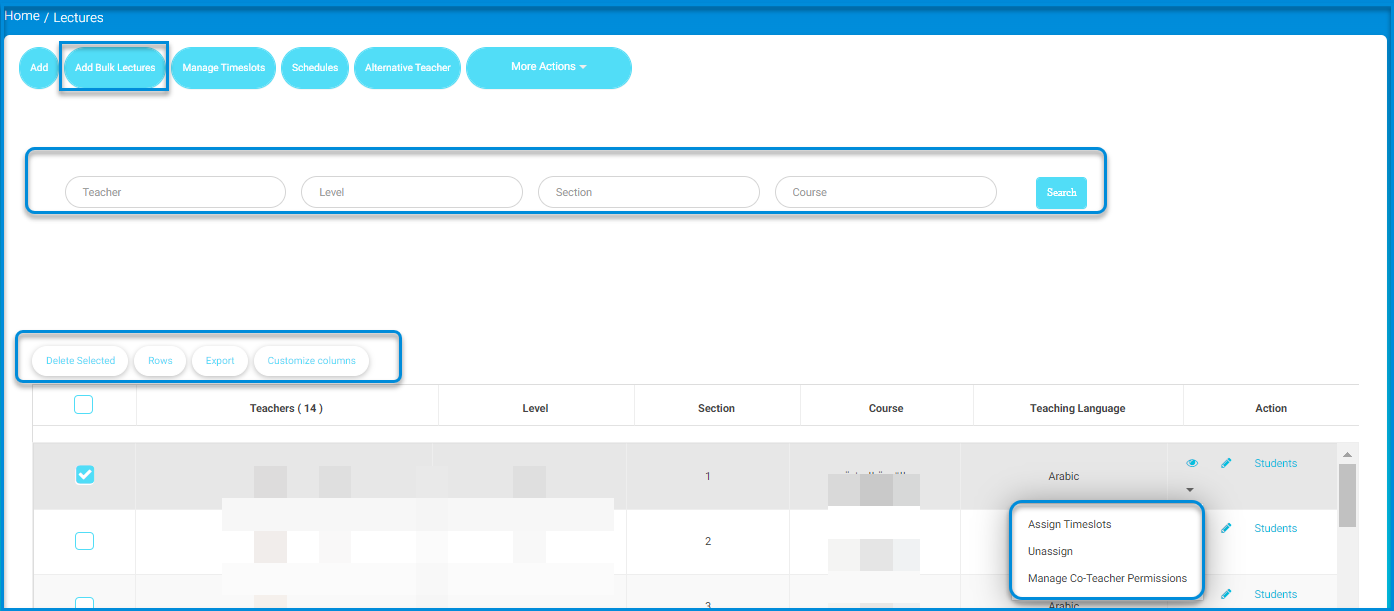
Adding a Lecture: #
- Click on the Courses Management dropdown from the sidebar menu.
- Click on the Lectures button to navigate to the lectures and their content screen.
- Click on the Add Bulk Lecture button.
- Enter the required data to add the lecture.
- Click on the Save All button.
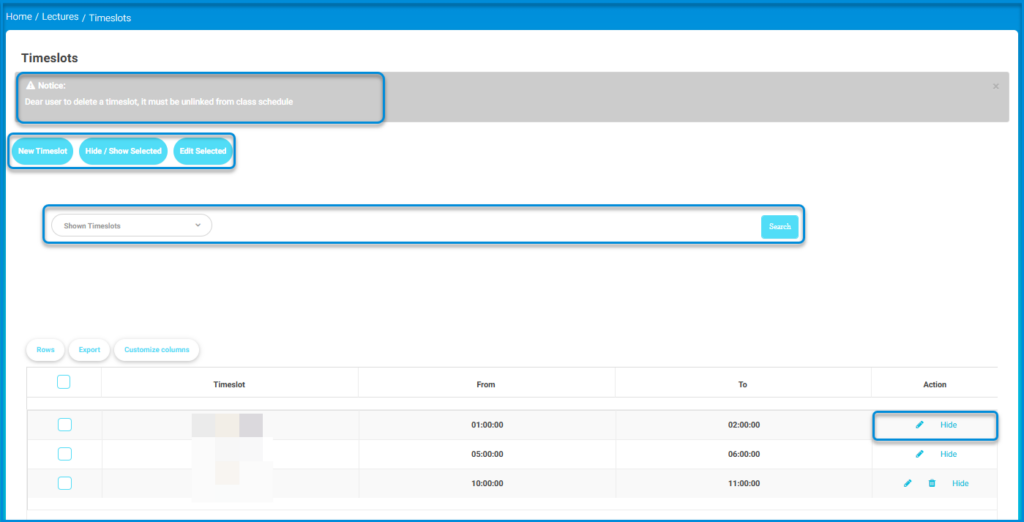
Managing timeslots:
- Click on the Manage Timeslots button from the main sections page.
- Click on the New Timeslot button from the main Manage Timeslots screen.
- Enter the time slot details:
- Enter the title.
- Select the level from the dropdown menu.
- Enter the lecture order.
- Enter the specified time slot from and to.
- Click on the Submit button.

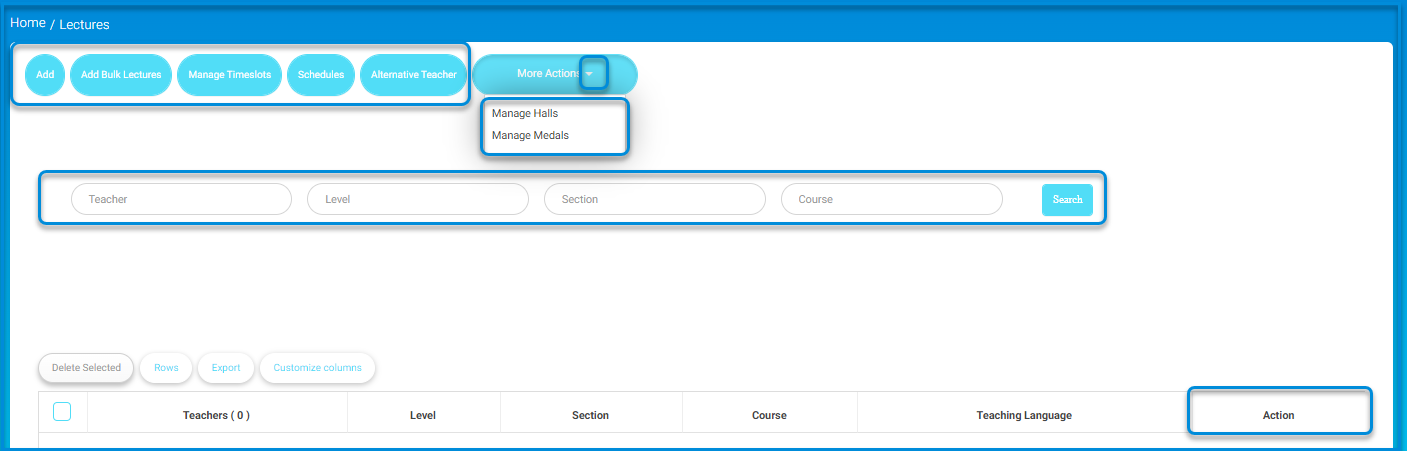
Managing Halls #
- Click on the More Action dropdown from the main sections page.
- Click on Manage Hall
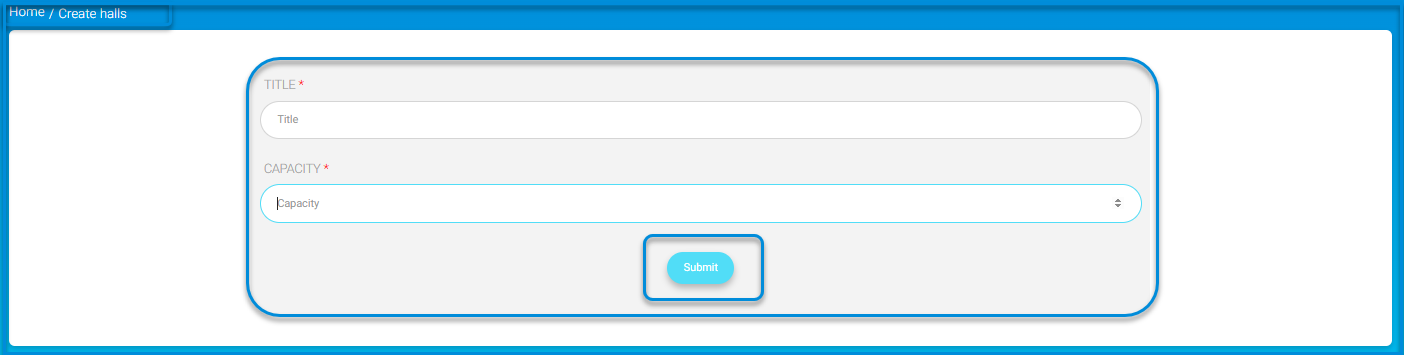
- Click on the Create New Hall button from the main hall management screen.
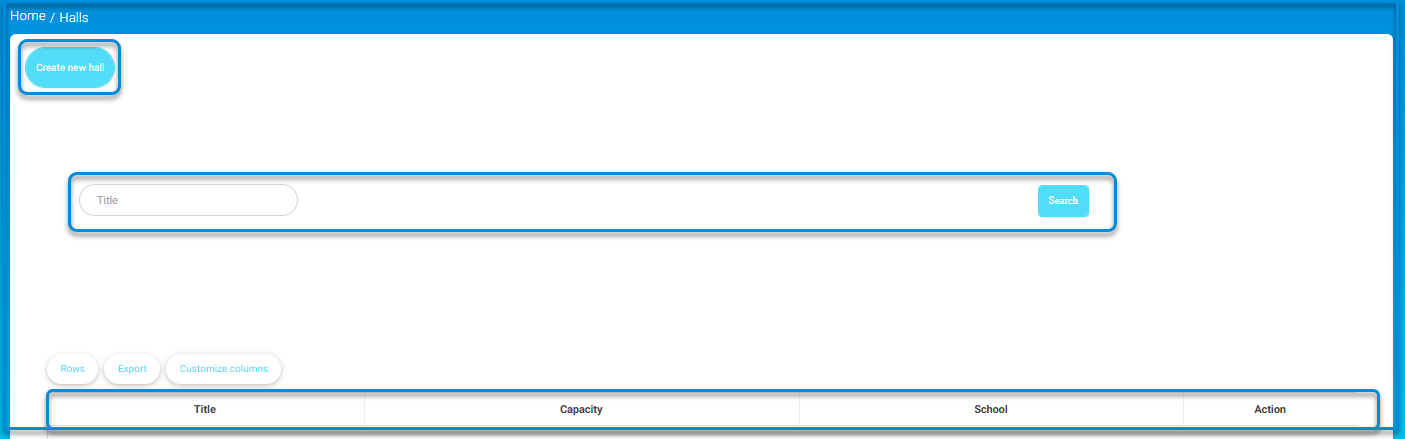
- Enter the required data to create the hall:
- Hall title.
- Hall capacity.
- Click on the Submit button.
Note: Complete these steps to access the Schedule Journal: Add Course, Add Lecture Group, Add Time Slot for the Course, Add Hall.
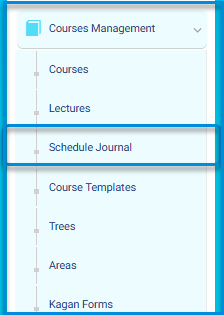
- To access the Schedule Journal, click on the Courses dropdown.
- Click on the Schedule Journal button.
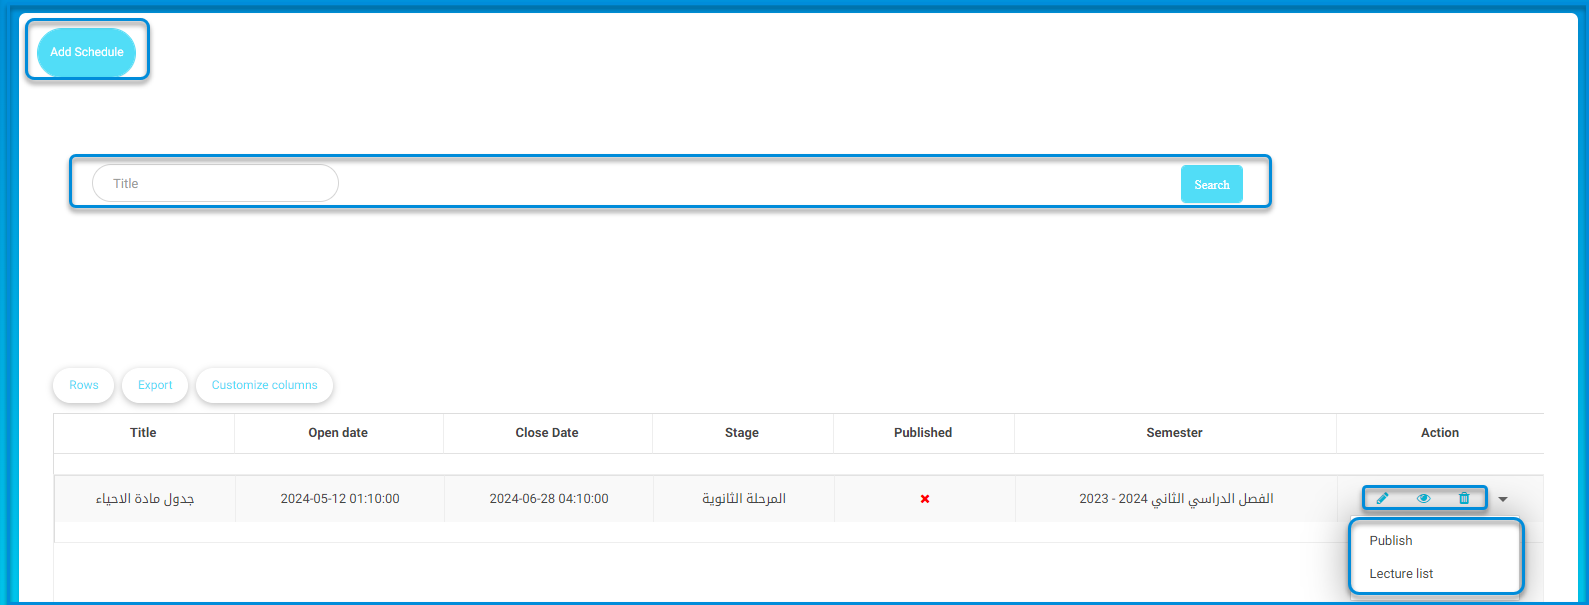
- The system will navigate to the Schedule Journal screen containing an Add schedule tab and a table containing a group of Schedule Journal on the platform and a search engine for schedule titles.

- Click on the Add schedule button.
- The user moves to the schedule related to the table data to be added All data is entered into their fields:
- Add the schedule title.
- Add the educational stage.
- Add the academic term.
- Specify the opening date.
- Specify the closing date.
- Specify the minimum approved hours.
- Specify the maximum approved hours.
- Control the schedule publishing settings by clicking on the Publish button.
Note: Please be aware that only one schedule can be published per educational stage per academic term.
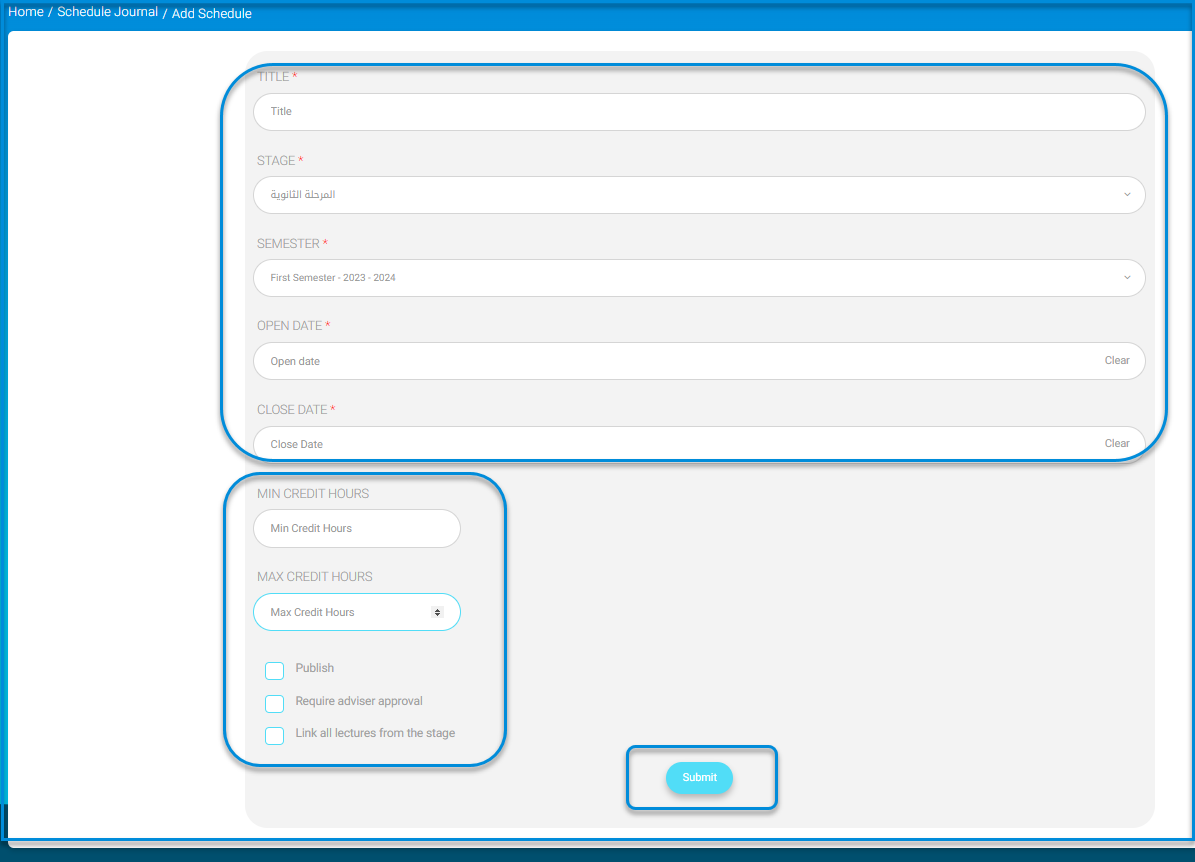
- Specify if this process requires supervisor approval by clicking on the Requires Supervisor Approval button.
- Control linking all lectures from the stage by clicking on the Link All Lectures button.
- After completion, click on the Submit button.
- schedule settings in the Schedule Journal are done as follows:
- Return to the main Schedule Journal page.
- Click on the Unpublish button from the dropdown menu of the added schedule data from the main table that contains all schedule on the main Schedule Journal page.
- Click on the Lecture List button from the dropdown menu of the schedule to add lectures to the hall.
Note: You must change the schedule opening date to the future from the Edit schedule Settings button.
- The system moves to the lecture list screen, which contains Add Lecture and Required Courses tabs and a schedule containing lectures related to the table and a search engine for them.
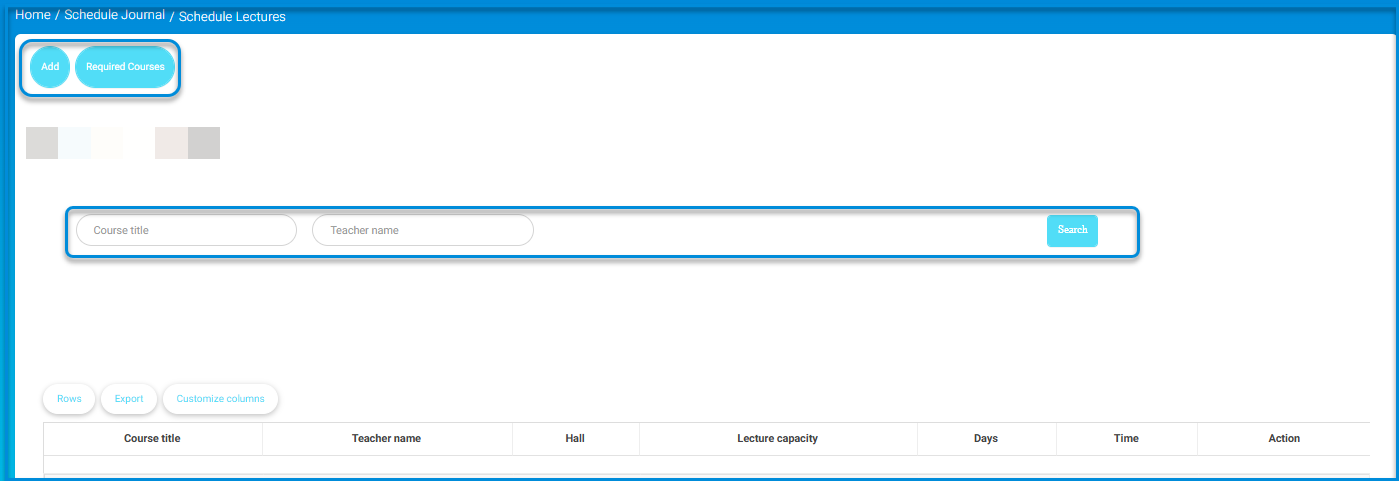
- Click on the Add button.
- Select the educational stage from the dropdown menu.
- Select the educational grade for the stage from the dropdown menu.
- Choose the appropriate course for the schedule.
- Click on the button to select the chosen course with the required capacity and hall.
- After completion, click on the Submit button.
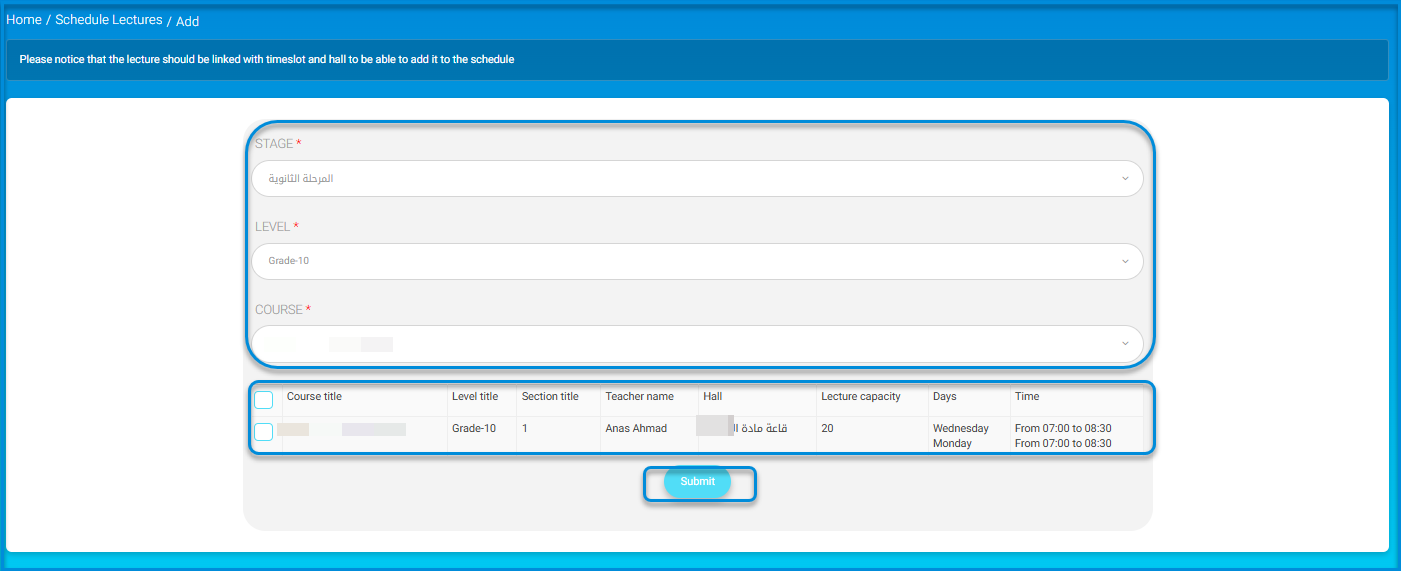
Note: Please note that the lecture must be associated with a time slot and hall to be added to the timetable.
- Upon completion, a screen indicating the successful process appears, and the lecture is displayed after being added.
- Click on the Students’ Selection button for them to choose their lectures.


