Table of Contents
- The first thing you need to do is click the Add Event to All button on the Calendar page.

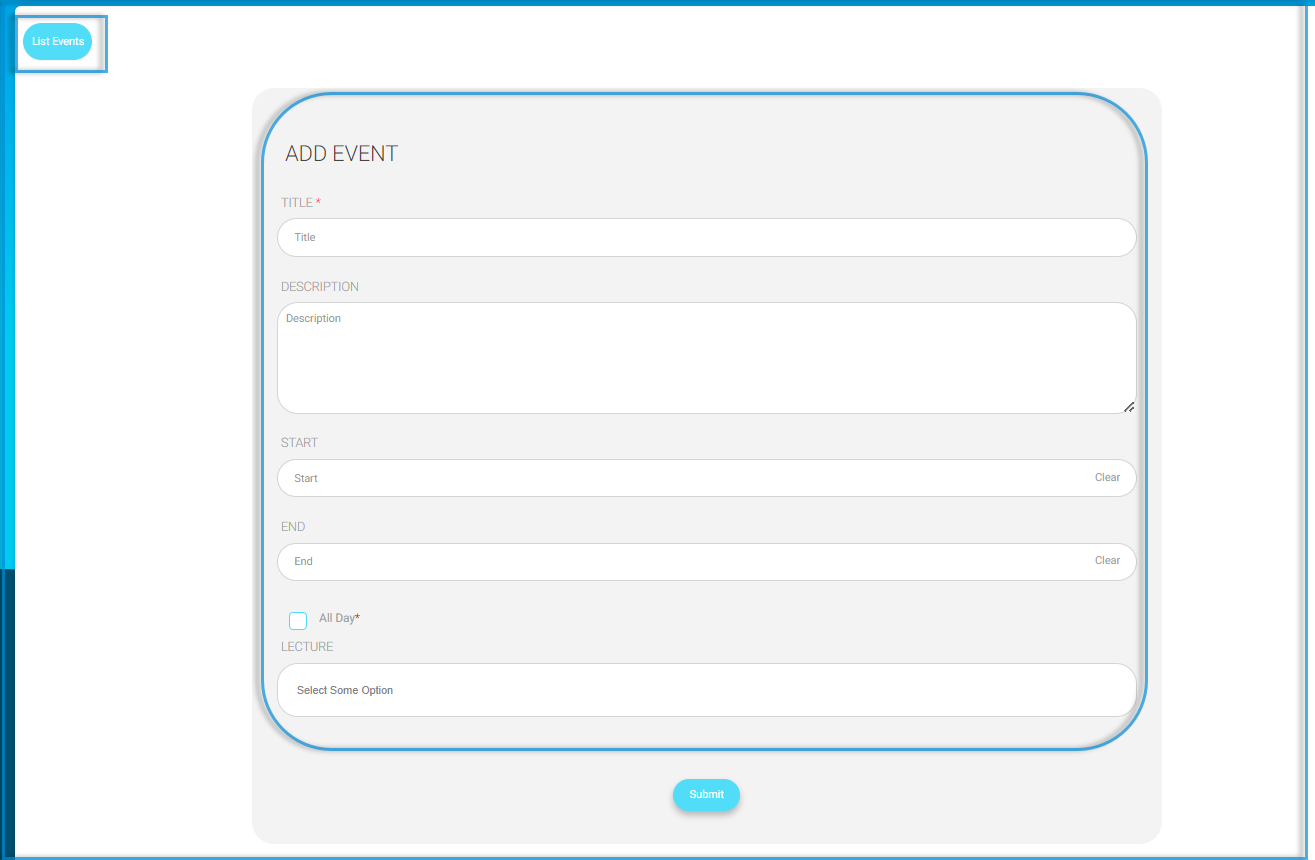
To Add an Event:
- Add a title for your event
- Write a description for this event.
- Set the Start date for this event.
- Set the End date for this event.
- Click All Day if you want the event to include all the day instead of putting a start and an end time for it.
- Click Submit to save your event settings.
- A message indicating that the event has been successfully saved will show at the top of the calendar.
Note: If this event will be added to specific users, then choose the Add Event to Selected Users button.
To Add an Event to All: #
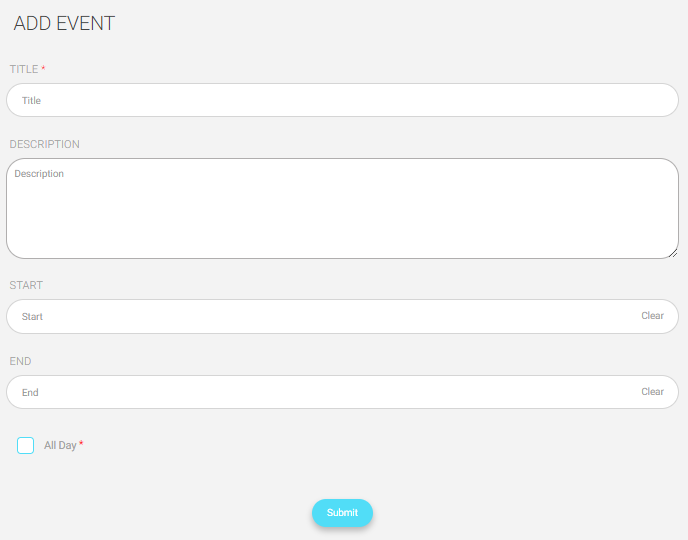
- Add a title for your event.
- Write a description to describe this event.
- Set the Start date and time for this event.
- Set the End date and time for this event.
- Check the All Day checkbox if this event will last all day instead of setting a start and end time for it.
- Click Submit to save your event settings.
- A message indicating that the event has been successfully saved will show at the top of the calendar.


